Sometimes I have an idea for a gift and I just have to make it. My dear colleague and friend Ceylan has left our office to pursue her dreams in Istanbul. I knew I wanted to make her something handmade and it was suppose to be something useful, too.
I decided to make Ceylan an open wide zipper pouch in extra big so she can use it as toiletry bag. And since Ceylan loves nail polish, I downsized the free pattern of the nail polish quilt block by Lori Holt of Bee In My Bonnet and made three of them in different shade of pink.
The bag was suppose to be very chic and classy so I went with Robert Kaufmann Essex Yarn Dyed Metallic in beige and that worked so well.
The other side of the bag has her name in the same shades of pink. The letters are hand drawn first and then transferred into fabric. I quilted in simple diagonal straight lines with this beautiful pink of 50wt Aurifil thread. The bag has a great texture!
The zipper is pink as well and it's such a great contrast to the beige linen fabric.
The lining fabric is a pink oil cloth so it suits the bag's use and it can be easily cleaned.
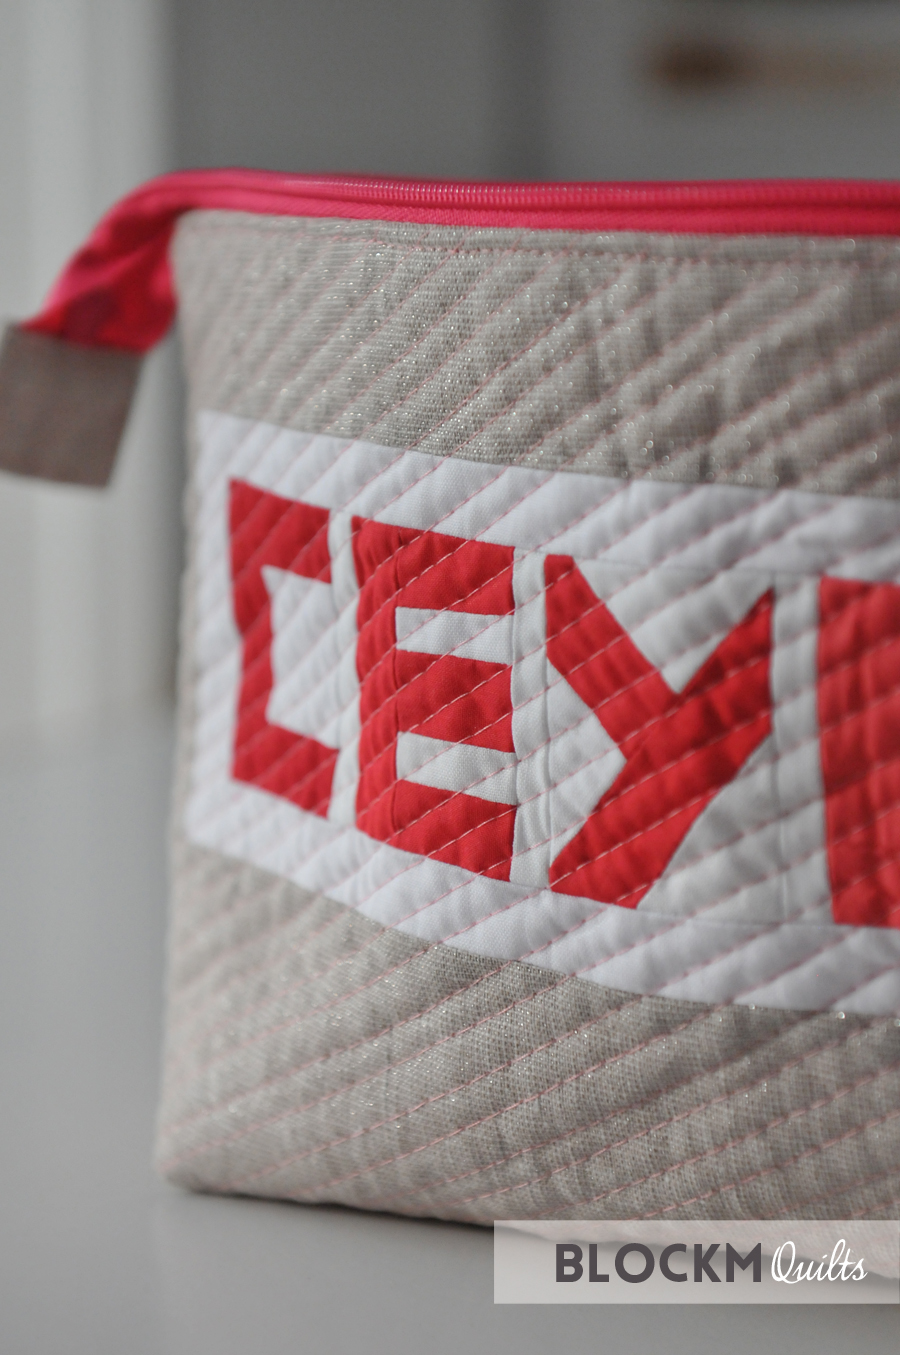
This pouch is seriously my masterpiece in form of a bag. I'm not a big fan of zippers but I do like the open wide zipper pouch by Noodlehead and these bags make great gifts. The size is customised though and it's about 15" (38cm) long and 7"(18cm) high.
In total it took me about 10 hours to make the bag and it was done in two days, all after work until the middle of the night.
But it was so worth it! Ceylan absolutely loves it and she said she always thinks of me when she sees the bag, so what is better than that?
Showing posts with label zipper. Show all posts
Tuesday, 16 July 2019
Wednesday, 1 May 2019
That orange zipper
I am going to 'Nadelwelt' (engl.: needle world) this coming weekend, it's the biggest German trade fair that has to do with needles, fabric and yarn. There's going to be quilts on show along other textile things. There's lectures and a big vendor hall.
It's the first time I will be going and I will be meeting with a lot of other quilters and sewists.
There will be a meet up on Saturday and there's a swap of zipper pouches organised. I made an open wide zipper pouch because they are my favourite zipper pouch to make.
I emptied my turquoise scrap glass and pulled these aqua and light turquoise fabrics and pieced them together and quilted straight lines in light grey.
With all these tone-in-tone colours I thought the pouch needed a bit of a 'bang', so I added a bright orange zipper.
I think this is very suitable and it turned out even better than I had imagined.
For the lining I used some colourful fabric with directional dots that add a bit of a surprise when you open the pouch.
I love those little zipper ends, really finished off the zipper nicely.
So this is going to be for one lucky swap partner. We all put our pouches in a big bag and everyone just picks a pouch randomly. I like that!
I will report back from the actual event when I'm back next week!
Tuesday, 4 September 2018
Boxy Pouch made from scraps
I had a lot of oddly shaped scraps left from my Pantone quilt 'Purple Haze' so I decided to use them straight away. I love that colour combination so much anyway.
I have been admiring these boxy pouches by Katie of SewKatieDid and I thought I have enough scraps to make one pouch. Because you can never have enough pouches!
That were the two panels I made. Mostly all strips were individually pieced with tiny scraps. Not the quickest way to do it but what can you do when you have small but lovely scraps?
And this one is really large! I first made it more squat but didn't like it so I adjusted it to make the shape of the pouch more square and I like it better that way.
While adjusting I also added a second strap, there's one at each end now which makes it easier to handle when zipping and un-zipping the pouch.
This lovely pouch is a great way to use up scraps or, what Katie suggest, using orphan blocks. I'll definitely make another one!
Linking to Finish it up Friday at Crazy Mom Quilts
Saturday, 15 July 2017
I made a Sew Together Bag!
I have always admired the Sew Together Bag but never attempted it as it looked... complicated.
But since I have set up my sewing corner in our living room while still cutting fabric on our kitchen table I have sewing tools in two places.
That really started to annoy me so I decided to make a Sew Together Bag to keep all my stuff together.
This bag is just genius! I have my very regular sewing tools in the open pockets so when I open the main bag they are readily available. My seam ripper is in the pink cross hatch pocket not visible. I also opted for a little pin cushion at the outer pocket.
I had so many left overs from my 'Playground Quilt' that I used these and bought zippers to match.
In fairness the bag is not easy to sew. And if it wouldn't be for Heather's Sew Along at QuiltBarn I would have never been able to make the bag. So thank you, Heather, for the very detailed blog posts with lots of photos!!!
I was looking at a lot of Sew Together Bags online for inspiration and found this blog post by Amanda of Crazy Mom Quilts and opted for little fabric pieces at the end of each zipper.
Not only does it add a little more colour it also is easy to sew. Since this is my first bag and I have not tried it without these fabric pieces but I would always do it again that way.
I quilted the outside panel of the bag in straight lines using three different Aurifil wt40 threads. This was actually the first time I quilted with my new Juki and I loved it!!
I also like that the bag looks so different at each side.
Inside the zipper pockets I have the less needed tools such as wonder clips, hera marker, measuring tape and small ruler, additional scissors and a finger hat.
I am currently making another bag as a present for my friends since I have a lot more scrappy strips left over to use for the outside of the bag.
I'm using the same fabrics again for the second bag apart from the pink fabric to the right in the photo. I realised that one open pocket in my bag is all in one colour (the mustard/white print) and to add a bit more variety I'm going with pink from the inside.
For the binding I used one of my favourite fabrics: Carolyn Friedlander's cross hatch in mustard.
I have also attached a little pink ribbon to the outer zipper, that is a little bit easier to open and looks good.
This will not be my last Sew Together Bag, I need at least two more in my house for various items to store. Also, this makes a great present!
The pattern can be found here and is by Michelle of SewDemented.
Sunday, 10 January 2016
First finish in 2016!
It's only the first week of January and I have already my first finish done! It's the smallest of my goals for the year but that doesn't matter.
It's another open wide zipper pouch following Noodlehead's tutorial. And I've also found this super tutorial by Ros of Sew Delicious. I never knew where to have the zipper pointed while sewing the layers together, sometimes I did it correct, sometimes I didn't but never knew why my zippers looked different. Now it's neat and tidy, great!
I used a coated fabric for the inner lining so that it's easy to clean.
This one is (again) for my Mum... I seem to make her a lot self made stuff recently but Mums always do so many great things that this is only a small way of saying 'thank you'!
Linking this to Finish up Friday with Crazy Mom Quilts.
Subscribe to:
Posts (Atom)


