Exactly one year ago today was the start of a very special quilt project. I initiated that my office would sew my boss and his wife, who both retired earlier this year from their architects practice, a quilt as a farewell gift.
16 colleagues with and without sewing experience (only one with quilting experience) offered to help sew the blocks for the quilt or help ironing and cutting the fabrics.
Given these facts I needed to come up with a block design that was easy to sew, even for inexperienced sewists and that also had a high design impact.
I'm always on the look-out for graphic designs and found that ceramic tiles are a great source of inspiration for my quilts. And when these tiles decorate a building by famous architect Oscar Niemeyer (1907-2012), the perfect design for this particular quilt has been found.
The quilt blocks are inspired by ceramic tiles designed by Brazilian artist Athos Bulcão (1918 - 2008).
I did some extensive research into his work. Please visit some of the sources I found, I think he should be more know than he is.
Foundation Athos Bulcão
Pattern Observer, History of Surface Design: Athos Bulcão, an article by Julie Gibbons
The Brazilian Report, Meet Athos Bulcão, the artist of Brasilia
Athos Bulcão: Tiles from Brasilia
I honestly could make at least a dozen quilts based on these tiles, they are so beautiful!
And here is the design I went for:
 |
| Tile Panel from Ministry of Foreign Affairs - Annex I - 8th floor, Brasilia, Athos Bulcão 1968 |
I made all the half circle blocks, since these are a bit more complicated to sew. All other five block designs were made by my colleagues. In total there were 80 blocks made, each block measuring 8.5"sq. The final size of the finished quilt was about 1,60 x 2,40m / 63 x 95".
I had no idea how quickly these blocks would come together, but the first group of 6 colleagues finished all 80 blocks in one day. The second group was due just two days later, so after the first sewing session I rushed into my local quilt shop and bought more fabrics for another 80 blocks. Because I couldn't tell all the super enthusiastic helpers from the second group that they don't have to come because the first group finished all blocks already.
That's when the quilt got a second front side.
I had a third and fourth sewing meeting with just three colleagues each putting the quilt top together. I finished off the quilt from then onward.
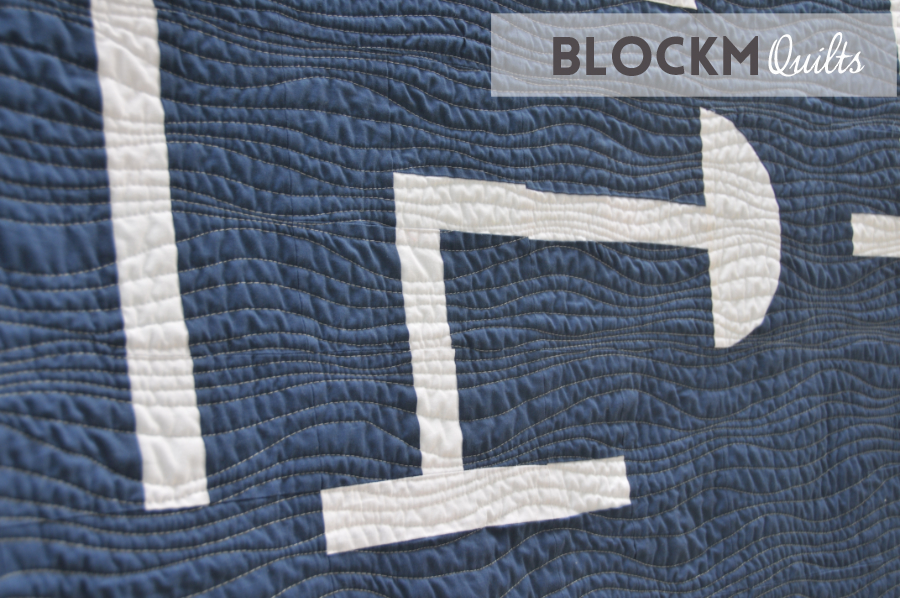
Putting the quilt tops together was quite challenging. Because the quilt blocks were made with seven different sewing machines made by 10 different people. That meant every block had a slightly different size and every seam allowance was different.
While assembling the blocks the main focus was that the white lines would match, which was not always the case. But I really like the little imperfections and that all these different makers are shown in the quilt. And that the quilt is not perfect but rather a labour of love.
A two sided quilt has it's challenges on a whole different level. First of all both quilt tops need to be the same size. Due to the many makers of these blocks that was not the case. So I added a border around both tops that I could trim after quilting. You have to allow for shifting of the three layers during quilting and for leverage when squaring the quilt off.
After squaring the quilt off the remaining border is more evident on the turquoise side as it stands out more, it's almost not visible on the blue side.
Then you need to have a quilting thread colour that suits both sides of the quilt. My first intention was to go with dark blue, but that would not have looked good on the turquoise side. So I opted for a white thread colour, that suited both sides and in the end was the better choice even for the dark blue side.
You also need to consider the quilting design. I first wanted to do something very geometric, suitable for the block design. But all blocks had a different size. You maybe can deal with that but you can never match the blocks on the reverse side, which were also all different in size.
I opted for an improv wavy line quilt design and it went really well with the overall design.
The last thing to be considered when doing a two-sided quilt is the colour if the binding. In my case that was quickly decided: white. It gives both sides such a nice frame. The only thing for me to decide was: which side is the back side of the binding, meaning which side would I hand stich? For me that was the second side, the turquoise one, since the blue side was always to be the original design idea.
The quilt was finished in April, but due to the COVID-contact-restrictions it was only gifted in early October along with a book that five colleagues of mine designed based on the quilt block design. The book contained photos of all 70 people in my office and photos of the 'making of'.
Here are both sides together. These blocks are actually very versatile and quilt designs seem endless.
My boss and his wife were over the moon with this thoughtful gift and all the effort and organisation that went into making the quilt and the book. My intention was to give them a lasting reminder and a warm hug from everyone in the office.
I named the quilt 'Athos & Oscar' given the two-sided nature of the quilt and honoring two great artists of the 20th century.